I don’t know a camper around that doesn’t have a piece or two of cast iron. That work horse of the fire ring or kitchen delivers time and time again. The rules are basically the same since its creation over two thousand years ago, season it well and dry it thoroughly after every cleaning. Cast iron cooking allows you to bake, grill, sear, stew, braise, sauté, caramelize, and brown just about any food.
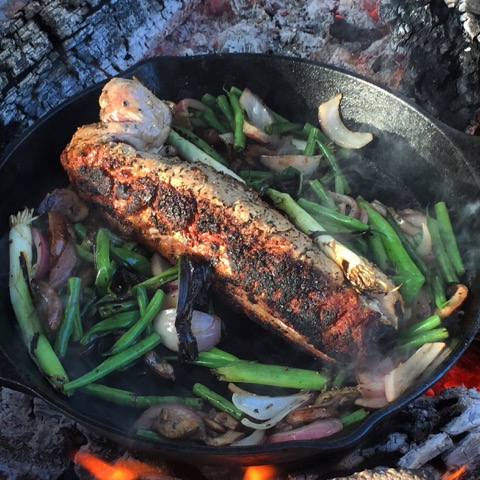
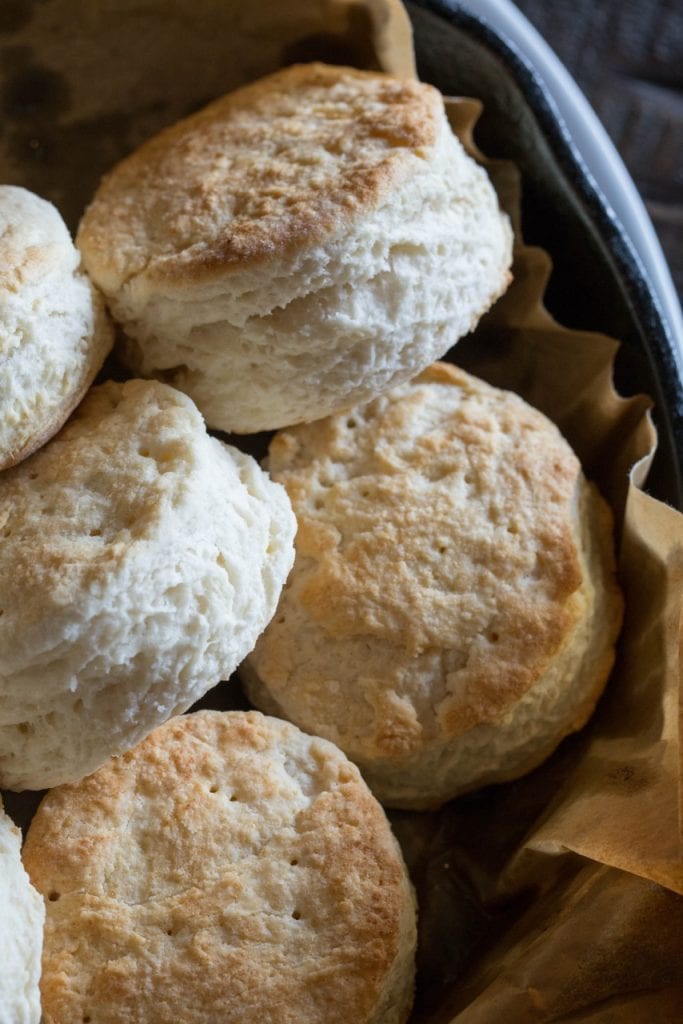
Baking biscuits in a Dutch oven are the all time camping food staple. Those soft and yet crisp edged biscuits have warmed hearts, bellies and souls for years. Think of a fresh-caught brown trout from the Rocky Mountains all cleaned and stuffed with garlic and fresh herbs then cooked to perfection in a cast iron grill pan over an oak wood fire. Are you getting hungry yet?
Cast Iron Manufacturers
If you ask a handful of people to name some cast iron companies they will say Lodge, Le Creuset, Wagner and Griswold. Truth be told over the past two centuries more than 50 manufacturers have created cast iron cookware, however the longest consistent manufacturer in the United States has been Lodge (since 1896). You can go to South Pittsburg, Tennessee to the foundry and take a tour. There you will see how molten iron is poured into sand molds, cooled and tumbled then packaged for resale. Consequently, you will also get a glimpse at some of the long forgotten cast iron cooking vestals, kettles and cookware of the past.
Cast Iron Seasoning
The most important part of your cast iron cooking routine is the cleaning and seasoning. Rule of thumb is not to use soap for every day cleaning, only salt and a scrub pad then dry it thoroughly and season it well with a non reactive high heat oil.
Seasoning oils, good to use, high smoke point
- Grape seed
- Canola
- Vegetable Shortening
Oils not recommended for use
Low smoke temp, can go rancid, does not react well to cast iron.
- Olive Oil, any type
- Nut oils; walnut, pecan, almond, coconut and pecan
- Butter
How to season your cast iron pots and pans
- Clean/Scrub skillet well in hot soapy water.
- Dry it thoroughly then place on stove top burner over medium low heat for 10 minutes.
- Turn heat off, add 1-2 tablespoon of grape seed oil. Wipe the oil with a paper towel all over the skillet, from the handle to the bottom side of the pan, be careful, its hot!
- Place skillet in a cold oven, upside down on the middle oven rack and set your oven to 400°. (Place a sheet pan on a lower rack to catch drips.)
- Bake 1 hour, turn oven off, let cool completely.
Your cast iron is seasoned!
Every Day Cast Iron Cleaning
- After cooking, scrape all food bits out of the cast iron.
- Pour a bit of Kosher salt into the pan and scrub with a damp sponge to remove any stuck on food.
- Rinse with warm water and repeat the scrubbing if necessary.
- Dry your cast iron thoroughly, place on stove top, turn heat to medium low and heat for 10 minutes.
- Turn off heat and pour 1-2 teaspoons of grape seed oil in pan and rub it in with a paper towel.
- Allow to cool, your pan is re-seasoned.
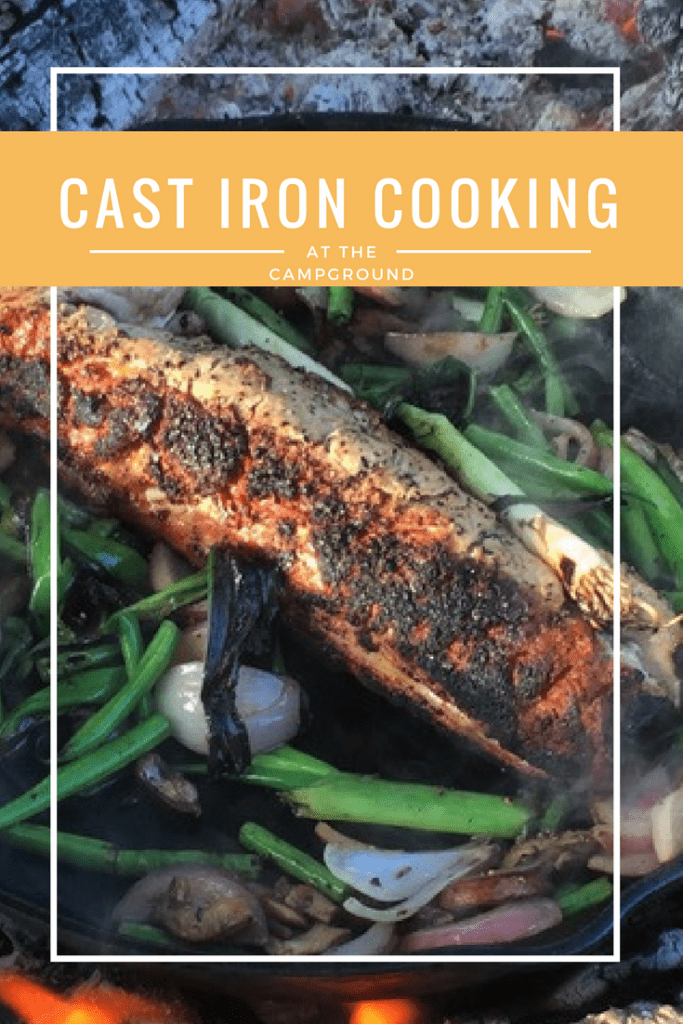
Cast Iron Cooking Around the Campfire
Picture yourself all settled into camp and its time to cook, but how do you know if the fire is at the correct temperature? Can you just put that cast iron pan in the hot coals? Here is a good answer to those questions. A great way to tell when your campfire is ready for you to cook on is this, the flames have died down and are no longer doing the jitterbug in the fire ring and the coals look like powder sugar has been poured all over them. The red-orange glow is deep down inside that heat cocoon. Now, take your well-seasoned cast iron and place it on the edge of the fire ring, give it 15 minutes then turn it 180 degrees and let another 15 minutes pass. It is now thoroughly heated and you can begin cooking.
You have two choices: you can place that hot pan on top of the coals or you can place it on the grill grates.
Just be warned if you do not pre heat that cast iron and you place it on the hot coals you can crack that pan. I can say with a straight and honest face, I cracked a 12” Lodge cast iron in half by just placing it on top of the coals and not pre heating it. Please I beg you don’t do what I did, it was terribly embarrassing.
Cast Iron Cooking at Home
Place your cast iron in a cold oven and turn on the heat to 500 degrees. Please make sure your oven is clean or you will get a house full of smoke. Let your pan pre heat for 30 minutes. That time in the oven will allow all the surfaces to come to temp evenly with out hot or cold spots. Cast iron is an amazing cooking tool that will hold its temperature perfectly. However, its not the best at conducting heat evenly. The pre heat is key to getting your food to cook evenly.
***
This recipe below is fantastic at the campground or at home, you can prep it a few hours in advance or place it in the freezer for up to 30 days. Enjoy!
Cast Iron Cooking Recipe: Herbed Pork Tenderloin
1 Pork tenderloin (about 1 ½ pounds)
4 sprigs rosemary
4 sprigs thyme
1 medium onion sliced
6 cloves of garlic, smashed
Salt and pepper
Grape seed oil
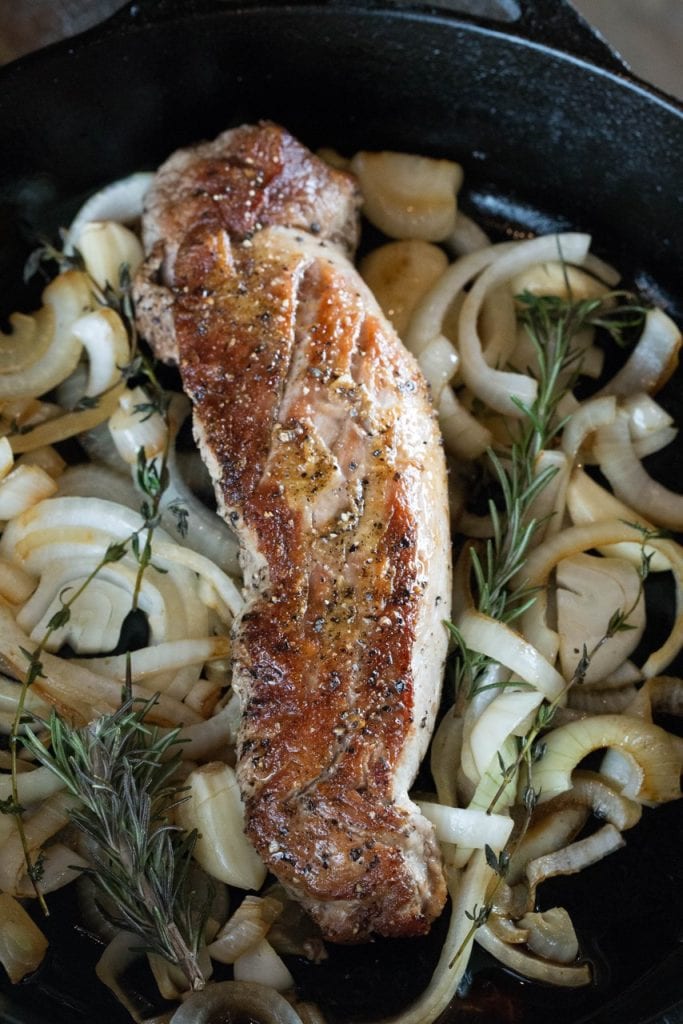
Preheat oven 500 degrees with your cast iron pan in it. While the pan is heating take pork tenderloin out and trim off any extra fat or torn pieces. Season it with salt and pepper then place back in the fridge. Slice your onion, smash garlic cloves, then wash the herbs. When your oven comes to temp, set timer for 30 minutes, this will allow your cast iron to heat thoroughly. After 30 minutes, take pork tenderloin out of the fridge. Carefully remove the hot pan from the oven and place on the stove top, light burner to medium high heat. Lower oven temp to 400 degrees. Add 2 tablespoons of grape seed oil to hot pan, add pork to the pan. Be careful it may splatter. Do not move pork for 10 minutes.
After 10 minutes turn it over so other side can sear, do not move for 10 minutes. Next add onions, garlic and herbs, mix around in the pan and place in the oven for 20 minutes. When time is done, remove pan and place the tenderloin on a cutting board to rest for 5 minutes. Finally, stir the onions and herbs in the pan and place on a serving dish, slice the pork and place on top of the onions and herbs.
Cast Iron Cooking Starter Kit Recommendations


Books for Further Reading


Guest post by our Texas correspondent Kate Dunbar from Kate’s Curious Kitchen!
Check out episode #133 of the RV Family Travel Atlas podcast to hear all about how Kate Equips her Airstream’s camp kitchen for cast iron cooking and more!
From her blog:
 I’m Kate and welcome to my curious kitchen. I love food, I love to travel, and, I adore creating flavorful and memorable meals for my family. Whether it is for my husband, our three children, my mother, or friends and family. I believe that food should not only nourish, but it should spark comfort, enjoyment plus adventures that are full of flavor. Just like the aromatic scent of fresh roasted and ground spices or sweet and silky homemade ice cream, it’s always about the experience and the taste of the food you create.
Farm fresh when possible and easy to prepare, I do not use box mixes or condensed soup from a can. I have simple and easy recipes for those ingredients. I absolutely will encourage you to take the extra few minutes to gather the ingredients and challenge yourself to create it.
Along the way you will be introduced to our love of Texas and our family home. Our family life in our Airstream Flying Cloud travel trailer plus my passion of owning and traveling in my vintage 1962 Shasta canned ham trailer. I have been blessed to be a chef, a published recipe writer and developer. This professional food career has now taken me to the curious world of food styling, food photography and podcasting! You can listen to my adventures with RV Family Travel Atlas and Campground of the Week on iTunes podcasts.
Simply stated, I believe food should be loved, enjoyed and shared. Cook food, create stories and memories and enjoy the adventure along the Kate’s Curious Kitchen way.
Cheers!
Thank you so much Stephanie & Jeremy, it was a lot of fun researching and writing about my all time favorite piece of cooking equipment. See you around the campfire! Kate
We love all that cooking expertise you bring to the RVFTA community!!!
Excellent read! I learned a few things about using and taking care of my lodge cast iron. Can’t wait to try the recipe!!
I’m so glad Joanne! Make sure to post a picture to the Facebook page- Kate
Some great ideas. Can’t wait for our next family camping trip!! Thanks.
I have recently bought an 8 inch Smithey Ironware skillet and it is hands down the best cast iron skillet I’ve ever used. It has a highly polished finish rather than the course grain of a Lodge skillet. They are pricey ($100 for the 8 inch) but I use it almost every day and will pass it on to my daughter.
I’m wondering how you clean your cast irons AFTER putting them in the fire. I’ve done this recently and they have held the smoky campfire scent! Any suggestions??